

If you have ever wanted to drape a saree but felt unsure where to begin, this guide is written for you. We will walk through the most common method to drape a saree — the Nivi drape — in seven simple steps, with notes on the mistakes beginners make and the small adjustments that turn a wobbly first attempt into something that holds beautifully through an entire evening. Learning to drape a saree takes practice. The first time you drape a saree rarely works perfectly. By the third or fourth try, it begins to feel natural. Take your time, and we will help you drape a saree confidently.
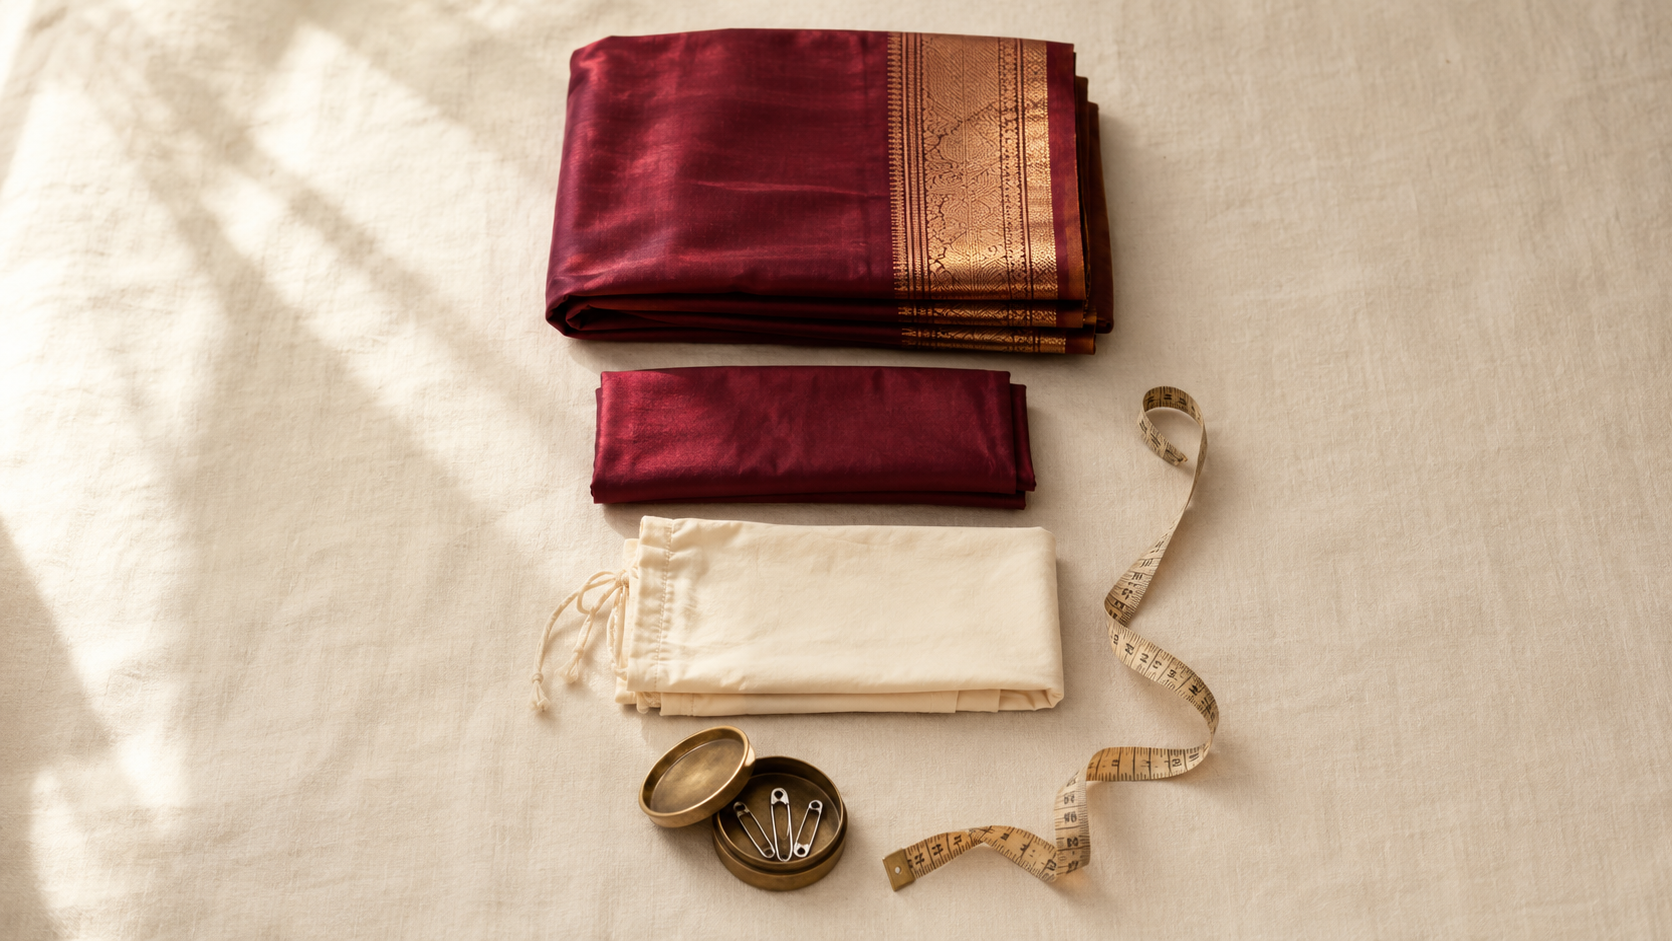
What you’ll need before you drape a saree
Before you drape a saree for the first time, gather the pieces. The saree itself is only one part of the outfit. The other pieces you need to drape a saree well matter just as much.
- The saree — typically 5.5 to 6 metres long, around 1.1 metres wide
- A fitted blouse — already stitched to your measurements before you attempt to drape a saree
- A petticoat — a simple cotton underskirt with a drawstring waist, in a colour close to the saree
- 2-3 small safety pins — for the shoulder and pleats
- A full-length mirror — ideally one where you can see your full body
- About 20 minutes — for a first attempt, more like 30. With practice this drops to 10
In this guide
A short note on the Nivi drape
There are over a hundred regional ways to drape a saree in India. The one we will teach you to drape a saree in this guide is the Nivi drape, which originated in Andhra Pradesh in southern India and is now the most widely worn drape across the country. The Nivi is the drape worn at offices, weddings, festivals, and everyday occasions throughout modern India. It is also the drape that most online tutorials teach and the one most pre-stitched ready-to-wear sarees follow.
For a beginner who wants to drape a saree for the first time, the Nivi is the place to start. The other regional ways to drape a saree — Bengali, Maharashtrian, Gujarati — are best learned after the Nivi feels comfortable. We touch on those briefly later in this guide. If you are completely new to sarees, our beginner’s guide to sarees is a useful read first.
Step 1 — Prepare the petticoat and the saree
To drape a saree well, the foundation matters. Start by putting on the petticoat and tying the drawstring at your natural waistline — not your hips. The petticoat should sit snugly at the waist, firm enough that the saree pleats will not slip out once tucked. A loose petticoat is the single most common reason a first attempt to drape a saree falls apart.
Once the petticoat is tied, unfold the saree and identify the two ends. The plain end (with less decoration) is what you will tuck in first. The decorated end — the pallu — is what eventually goes over your left shoulder. If both ends look similar, either can go over the shoulder.
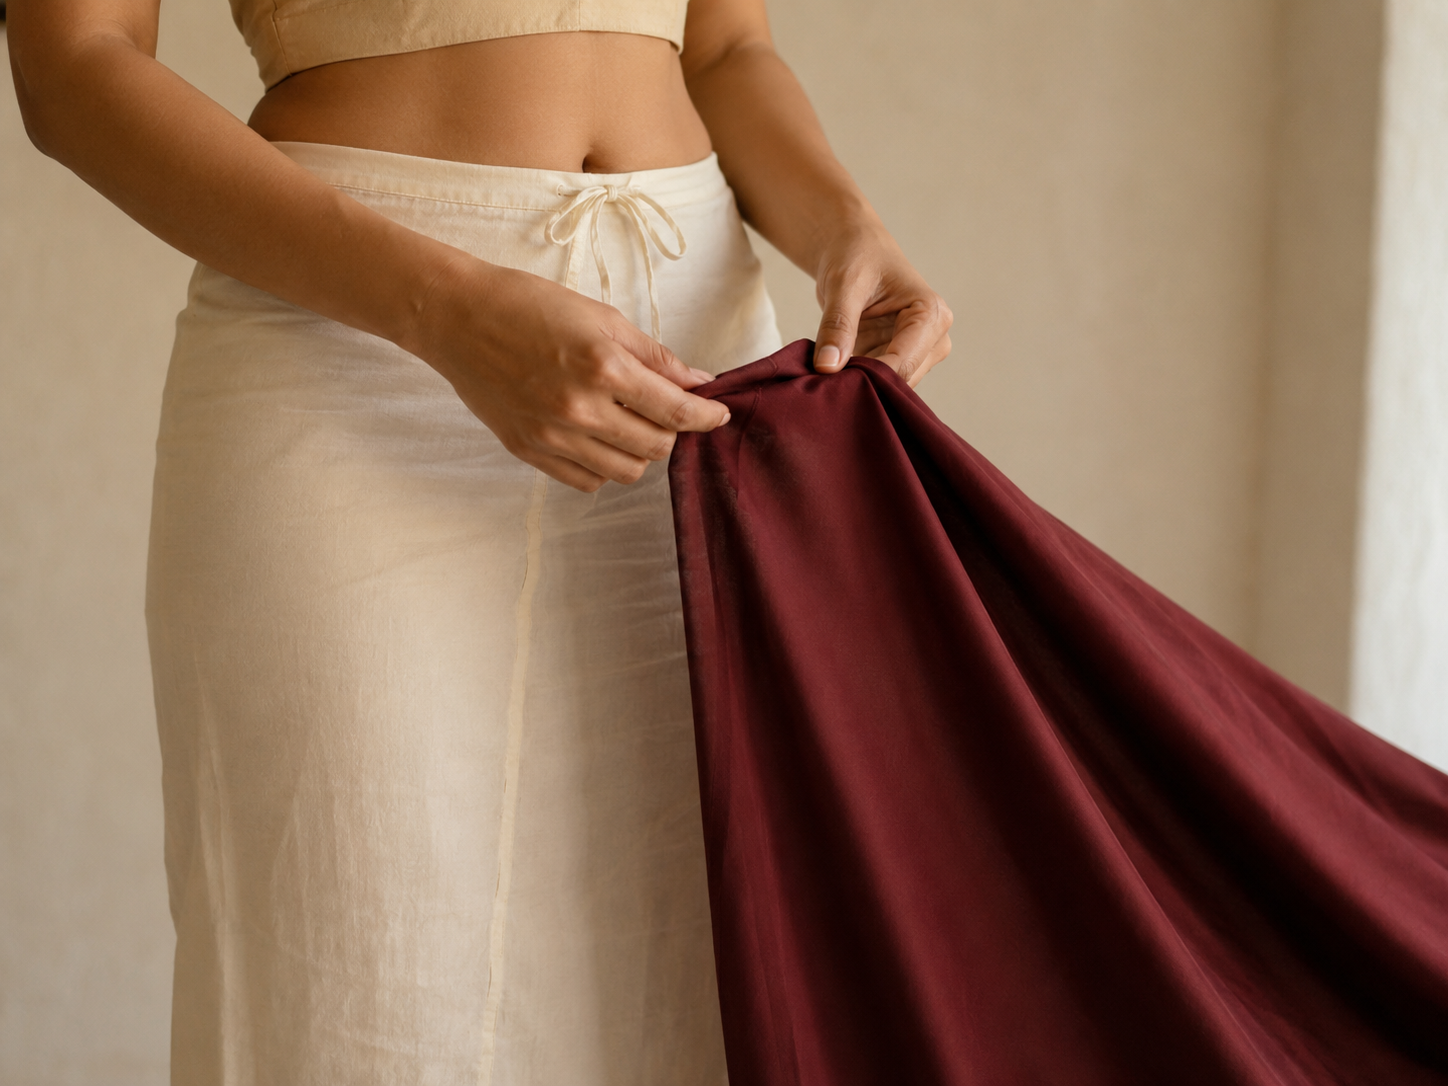
Common mistake at this step
The petticoat is tied too low — at the hips rather than the waist. When the petticoat sits at the hips, the saree pleats sag throughout the day and the saree’s length is uneven. Tie the petticoat at the natural waistline, just above the hip bones, and firm enough that you can feel it sitting in place.
Step 2 — Tuck the inner end into the petticoat
Take the plain end of the saree in your right hand. Place the upper edge of this end at your right hip, with the rest of the saree falling toward your right side. Tuck the upper edge into the petticoat at the right hip, going inward toward your front. The saree should now be hanging from your right hip, with its lower edge brushing the floor.
The bottom edge of the saree should just touch the top of your foot — not bunch on the floor, not ride above your ankle. This is the moment to adjust the length. If the saree is too long, tuck a little more into the petticoat. If it is too short, ease some out. Get this right before going further.
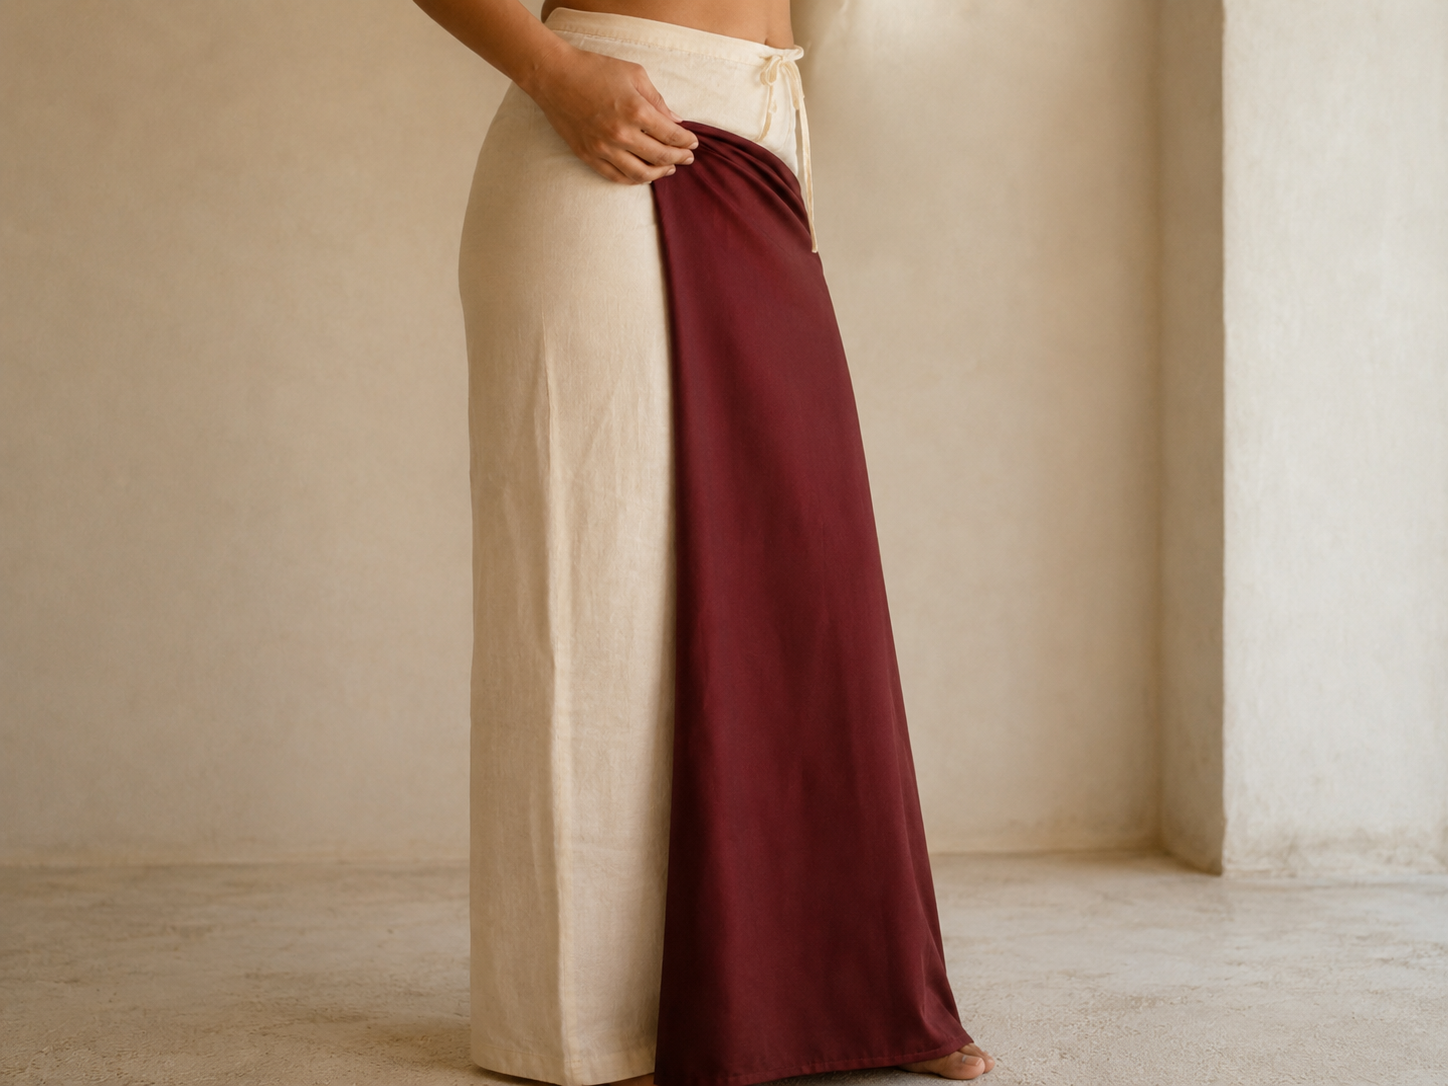
Step 3 — Wrap the saree once around your body
With the first tuck in place, take the rest of the saree and bring it across the front of your body, then around your back, then around to your front again — completing one full wrap around the waist. The saree should now be wrapped once around you, with the long remaining length emerging again at your right hip.
This single wrap is what holds the lower part of the drape in place. It should sit smoothly against your body — not loose, not so tight that it pulls. The wrap should be even from waist to hem, with no diagonal slant. Smooth out any folds before going further.
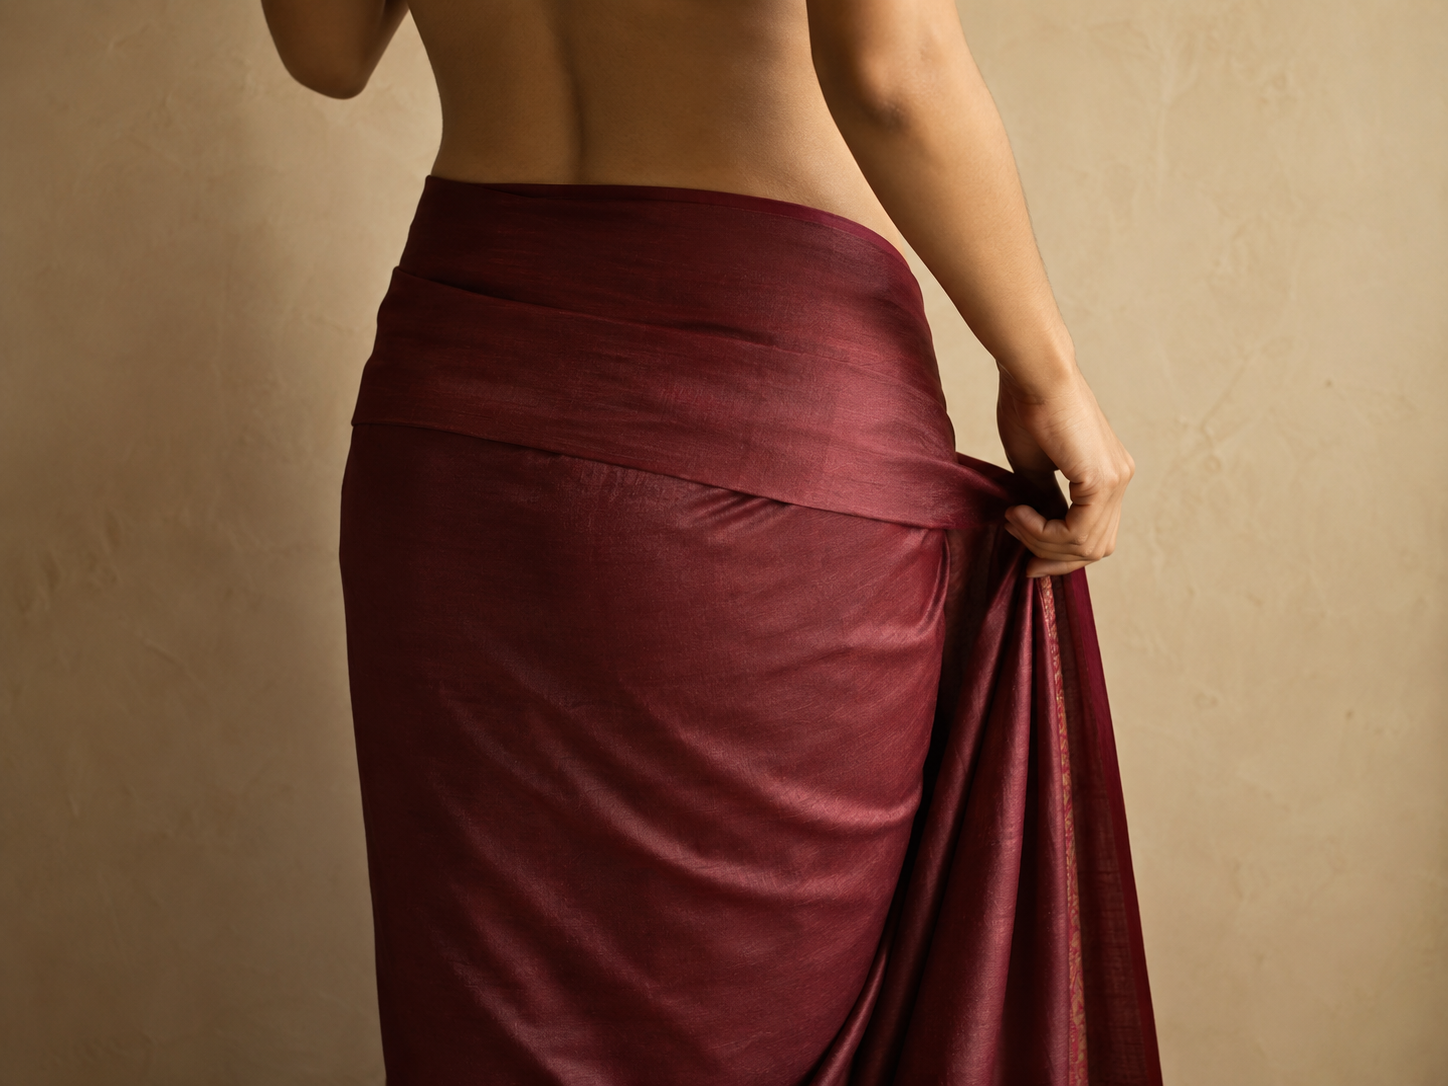
Common mistake at this step
The wrap is either too tight (restricting your stride) or too loose (sagging at the waist). To drape a saree comfortably, the wrap should be snug enough to feel secure but loose enough that you can walk normally with a comfortable stride. If you cannot take a full step without the saree pulling, the wrap is too tight. If the saree sags away from your body, it is too loose. The right wrap is what lets you drape a saree that holds for hours without re-adjusting.
Step 4 — Make the pleats at the front
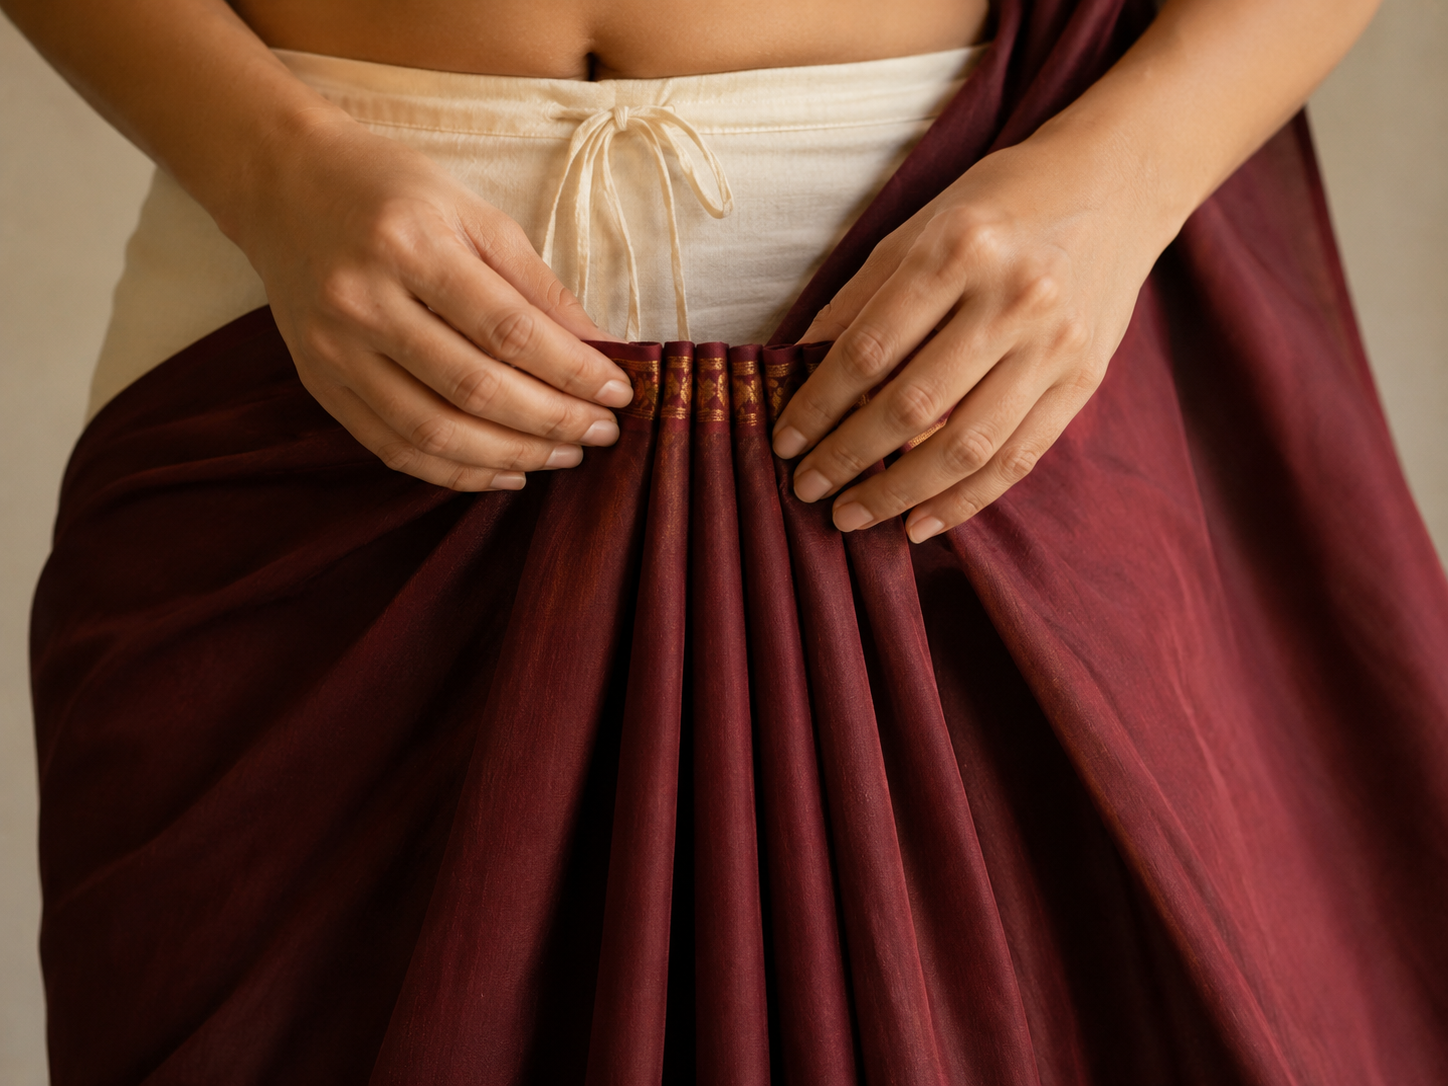
This is the central skill of how to drape a saree. After the single wrap, you should have a long stretch of saree fabric remaining, with the pallu at the far end. From the point where the saree emerges at your right hip, measure roughly the distance from your hip to the floor along the upper edge of the saree — this is where the pleats begin. Even pleats are what let you drape a saree with a polished front.
Take the upper edge in both hands. Make even pleats, each about 12 to 15 centimetres wide, gathering the fabric like a folded paper fan. Most experienced wearers make 5 to 7 pleats. Keep the upper edges of all the pleats aligned — they should stack neatly. The pleats should fall vertically and reach the floor evenly.
Common mistake at this step
The pleats are uneven in width. When pleat widths vary, the front of the drape looks messy and the pleats fall awkwardly. Take your time at this step. Make each pleat the same width as the last by feel. Hold the pleats together at the top with one hand while gathering the next with the other. Even pleats are the difference between a polished way to drape a saree and one that looks rushed.
Step 5 — Tuck the pleats into the petticoat
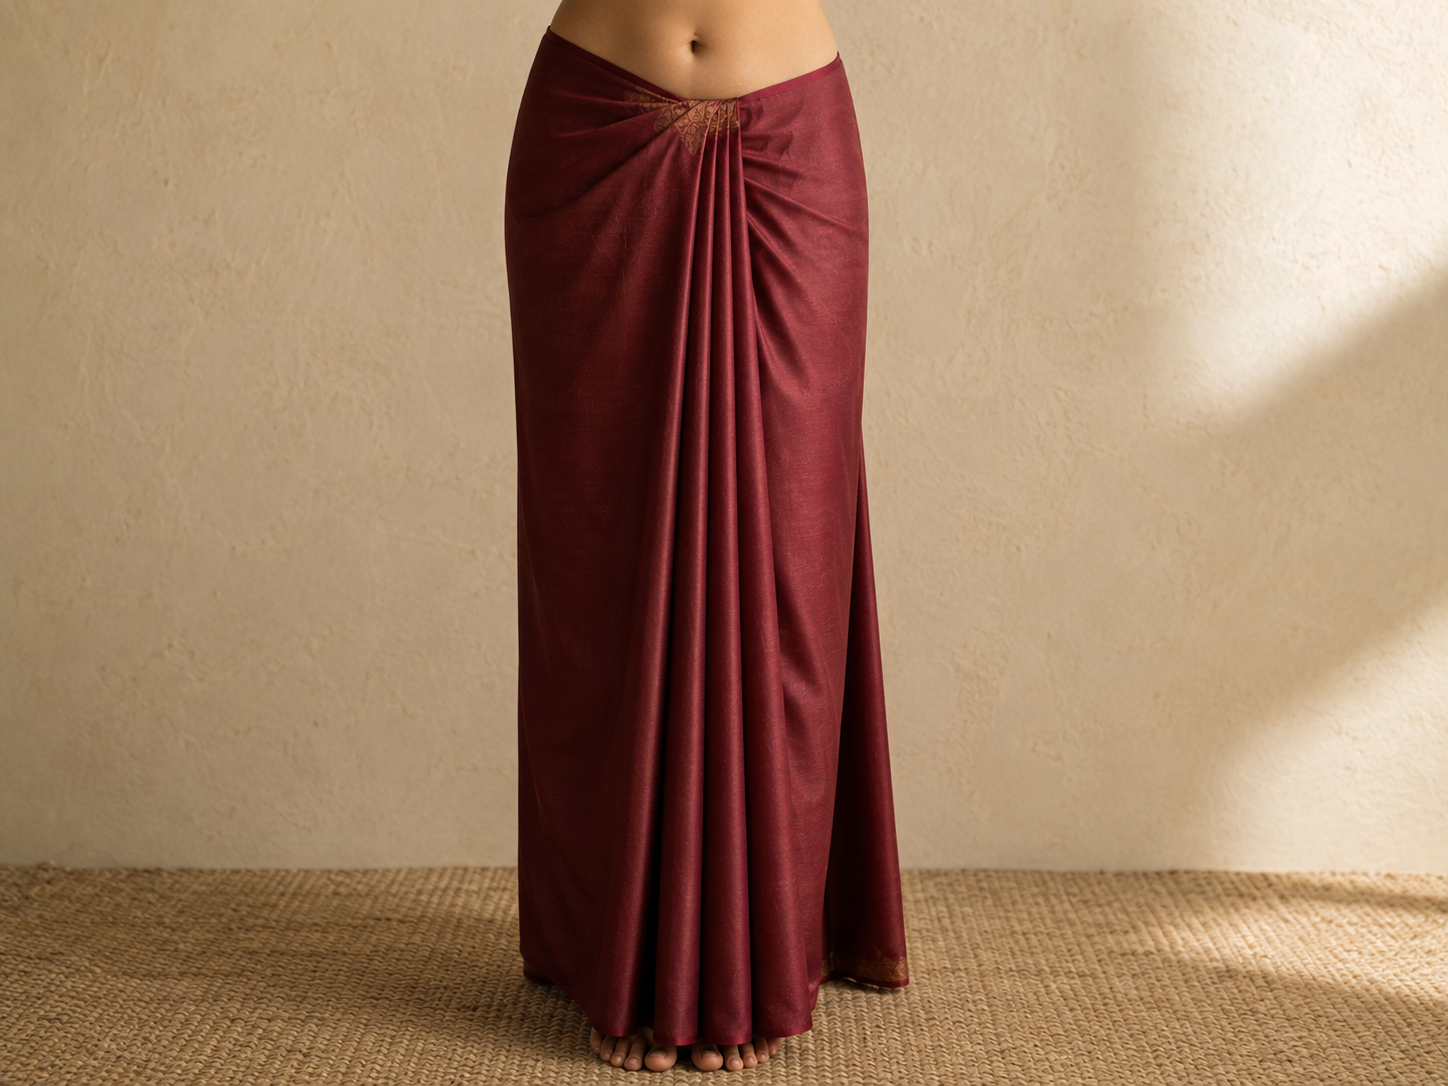
Holding the pleats together at the upper edge, tuck them into the petticoat at the front centre of your body, slightly to the left of the navel. The pleats should now hang vertically from the tuck point down to the floor. Push them in firmly so they sit secure, but do not bunch the upper edge inside the petticoat — the pleats should fall flat and clean.
Once tucked, run your hand down the front of the pleats to straighten them. They should hang in a neat vertical column, all the same length, no diagonal slant. If a pleat falls forward or splays, gently tuck it back in line with the others.
Step 6 — Drape the pallu over the left shoulder
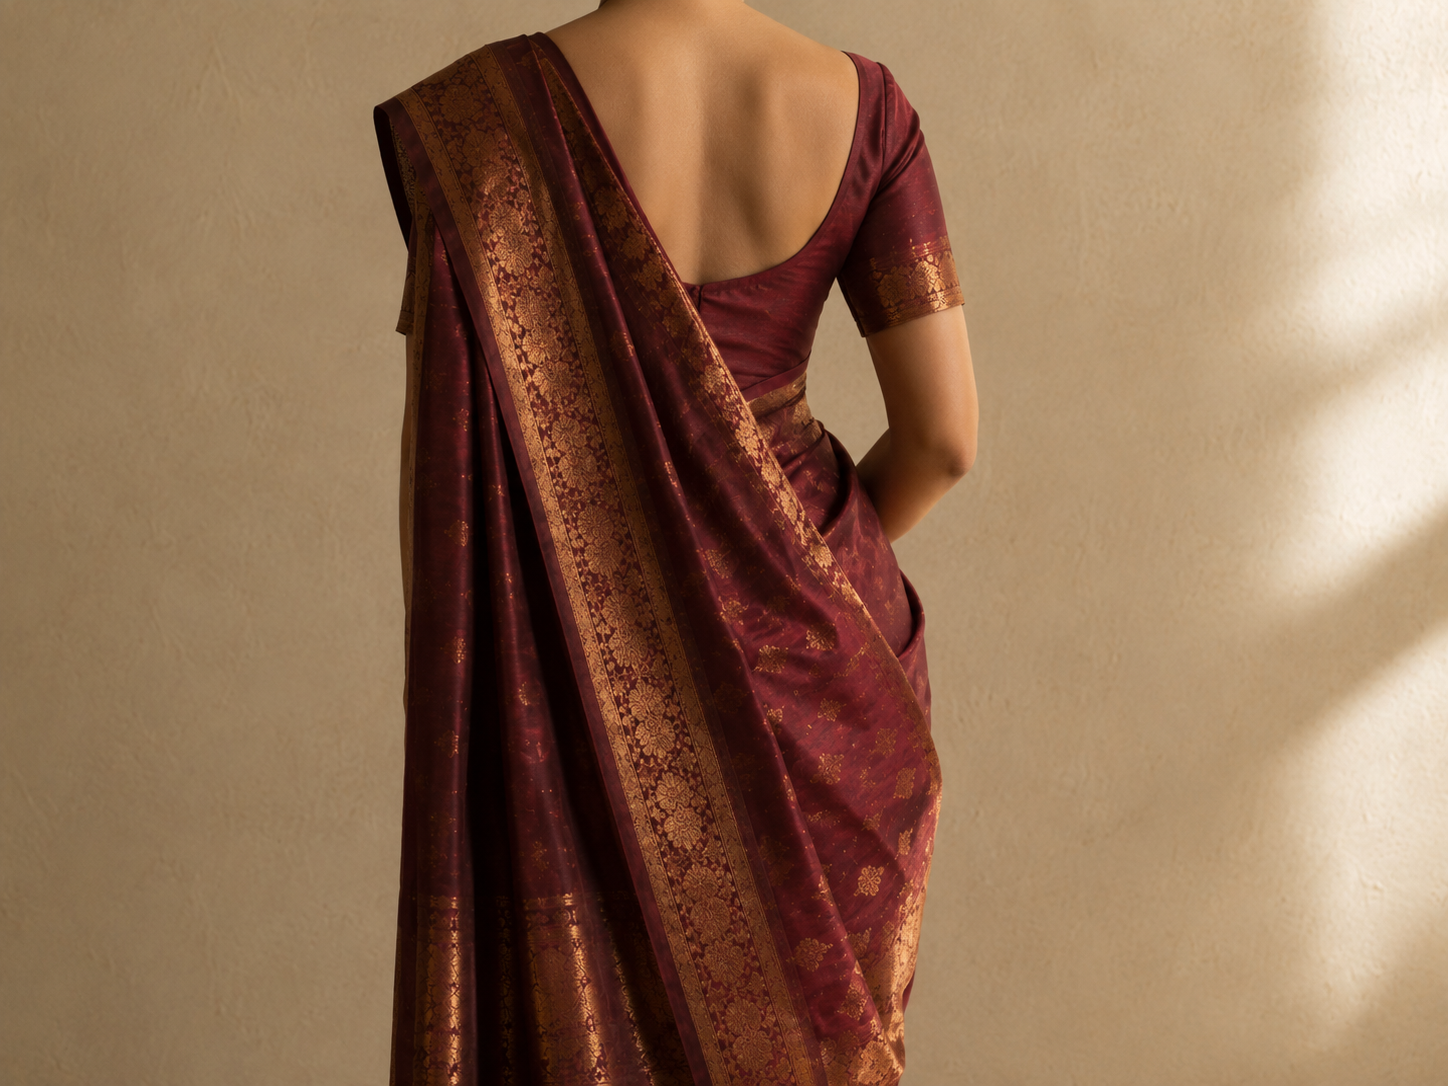
The remaining length of the saree — from the tucked pleats outward — should now reach across your front, up over your left shoulder, and fall down your back. Bring the fabric diagonally across your front, smoothing it as you go. Lift the pallu over your left shoulder so it hangs down your back.
How far the pallu should fall is a matter of personal preference. The traditional length reaches roughly to the back of your knees. A shorter pallu can fall to mid-back. A longer pallu — sometimes seen at weddings — can reach the floor. For a first attempt, aim for the back of the knees.
Common mistake at this step
The pallu is twisted or sits awkwardly. Before going further, run your hand from the shoulder down the length of the pallu to make sure the fabric lies flat against your back. If the pallu twists at the shoulder, lift it off and lay it down again with the right side facing outward.
Step 7 — Pin and final adjustments
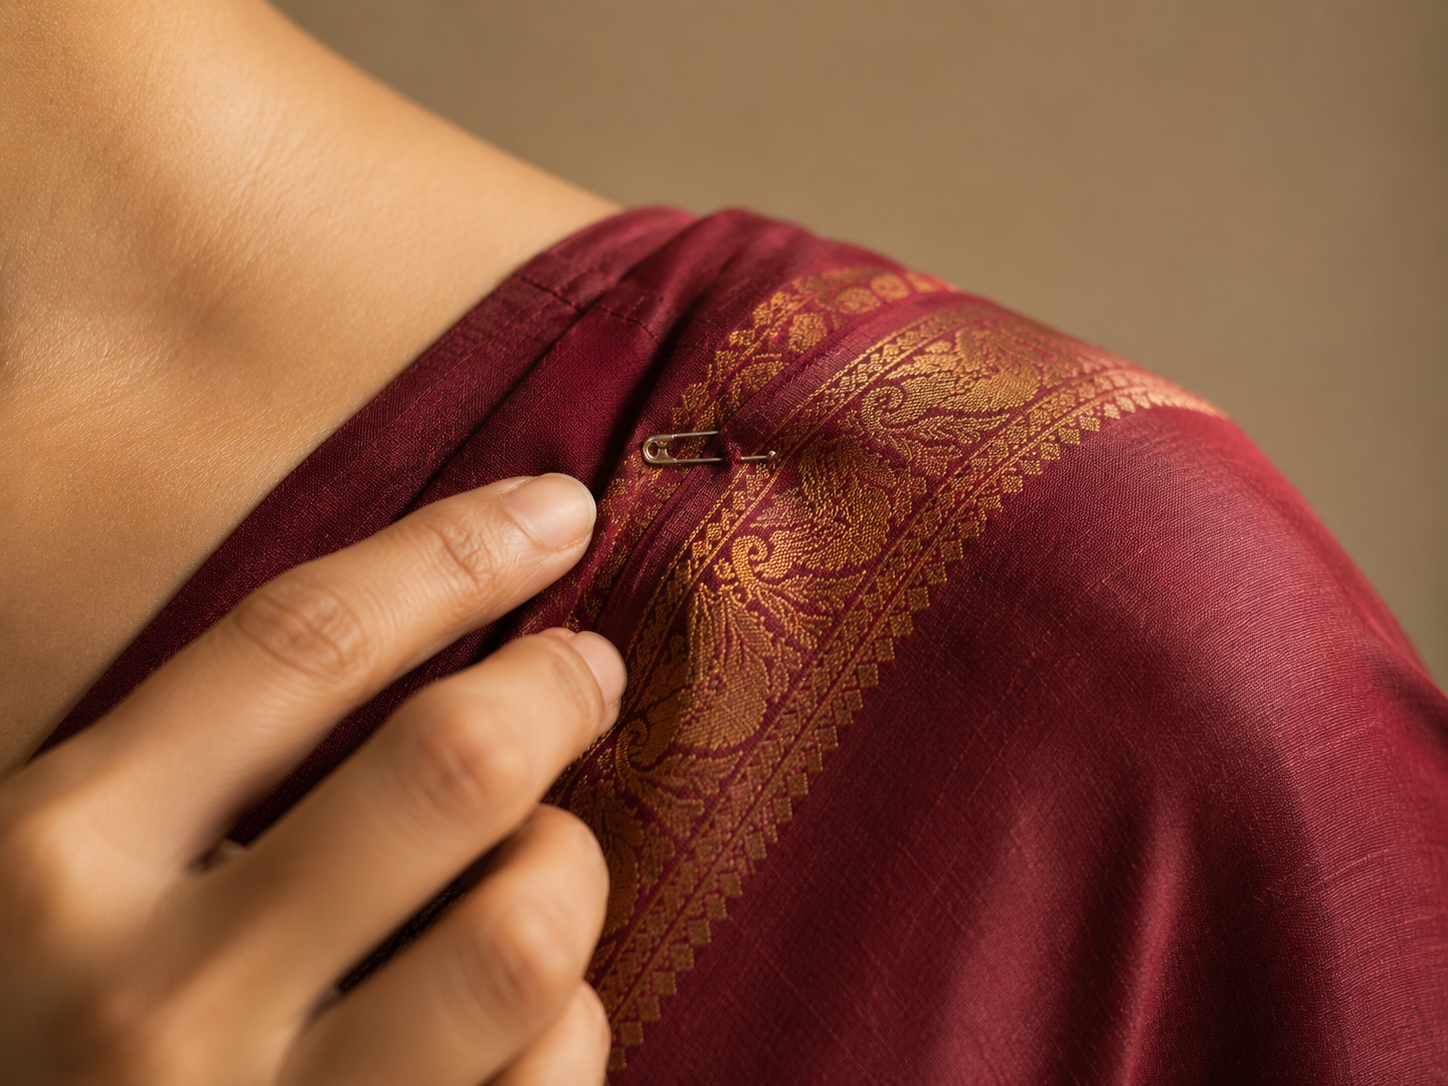
Most experienced wearers use a small safety pin to secure the pallu at the shoulder. Pin through the pallu and the blouse together at the shoulder seam, taking a tiny stitch so the pin is barely visible. This single pin makes the difference between a drape that holds and one that slowly slips.
Optionally, a second pin can hold the inner edge of the pleats to the saree wrap at the waist — useful for the first few times you drape a saree, less needed once your tucks become more confident. Take a final look in the mirror. Check the hem is even all the way around. Check the pleats are straight. Check the pallu hangs smoothly. Adjust until you are happy with how it sits. Once it does, you have learned to drape a saree.
How fabric affects the drape
The seven Nivi steps work for any saree fabric, but each fabric drapes slightly differently — the pleats fall differently, the pallu behaves differently, the pinning requirements change. A first-time wearer who knows the fabric quirks will drape a saree more confidently. Our fabric guides cover the drape-specific notes for each:
- Cotton saree guide — the most forgiving fabric to learn on; structural body holds pleats by friction
- Tussar silk saree guide — the second-most-forgiving fabric; slubby texture hides small pleating mistakes
- Chanderi saree guide — lightweight silk-cotton; needs an extra pin at the pallu
- Georgette saree guide — fluid drape; pleats need careful gathering
- Chiffon saree guide — the most fluid fabric; needs cotton petticoat for friction and double pinning
- Organza saree guide — crisp and voluminous; pallu floats and needs two pins minimum
- Pre-stitched saree guide — the alternative format if draping from scratch feels too much
For the first three or four practice sessions, we recommend starting with a cotton saree before attempting silk, georgette, chiffon, or organza. The weight and friction of cotton make every step easier.
How to drape a saree differently — three regional variations
The Nivi we have just walked through is the most common way to drape a saree, but it is not the only way. Once the Nivi feels familiar, the world of regional drapes opens up — each with its own logic, history, and visual character. You can drape a saree in dozens of distinct styles across India. We will publish dedicated tutorials for each of these in the coming months; for now, a brief introduction to three of the most distinct ways to drape a saree.
Bengali drape
The Bengali drape — worn across West Bengal and Bangladesh — pleats the pallu differently and brings it across both shoulders rather than just the left. The pallu typically falls in front from the right shoulder, often with a set of keys tied at the corner as a traditional touch. Bengali drapes pair beautifully with red-bordered white cotton or silk sarees and are most often seen at Durga Puja.
Maharashtrian Nauvari
The Nauvari is a nine-yard drape from Maharashtra, longer than a standard saree, that pleats between the legs in a way that closely resembles a dhoti. The Nauvari was historically worn by women who needed freedom of movement and remains the traditional bridal drape in many Maharashtrian communities. It looks completely different from the Nivi.
Gujarati seedha pallu
The Gujarati drape reverses the direction of the pallu. Where the Nivi sends the pallu over the left shoulder to fall down the back, the Gujarati seedha pallu sends it over the right shoulder to fall across the front. The decorated end of the saree is fully visible on the chest. Gujarati drapes are common at weddings across Gujarat and Rajasthan.
Tips for a first drape — what we learned the hard way
The first time we tried to drape a saree, we spent forty-five minutes and still ended up with uneven pleats. The drape lasted about an hour before something slipped. A few hard-earned lessons that would have saved us trouble.
First, practise with a lightweight saree before you attempt a heavy Banarasi or Kanjivaram. A simple cotton or georgette saree is forgiving — it pleats easily, the fabric is light to handle, and mistakes are easy to undo. Once you can drape a saree in cotton confidently, the same steps work for heavier silks. Read our cotton saree guide for the practice fabric, and our honest comparison of Banarasi and Kanjivaram silks for the heavier silk decision once draping feels natural.
Second, wear comfortable footwear from the start. Trying to drape a saree while balancing on heels is unnecessarily difficult. Flat shoes or bare feet make the early attempts much easier.
Third, watch one trusted video tutorial alongside this guide. The combination of a written guide and a video on your first time to drape a saree accelerates the learning curve. According to Vogue India, the saree’s resurgence among younger wearers has been helped by exactly this — accessible tutorials that meet beginners where they are.
Finally, for European wearers thinking about how to drape a saree through cold months, our winter saree guide covers the layering principles that adapt this drape for cold weather. And if the drape itself feels like too much for a particular occasion, our pre-stitched saree guide covers the ready-to-wear alternative.
Frequently asked questions
How long does it take to drape a saree?
For a first attempt to drape a saree, expect 25 to 30 minutes. By the third or fourth attempt this drops to about 15 minutes. Experienced wearers drape a saree in 5 to 10 minutes. Pre-stitched ready-to-wear sarees, with the pleats and pallu already sewn in, can be put on in 2 to 3 minutes — useful for first-time wearers who want the look without the learning curve. See our pre-stitched saree guide for the full case.
Do I need to be tall to drape a saree?
No. A saree is a flexible garment that adapts to any height. The length you tuck into the petticoat is what adjusts for height — shorter wearers tuck slightly more in; taller wearers tuck slightly less. The drape itself looks elegant on every height and body type. Tailoring the blouse to fit well matters more than height when you learn to drape a saree. Our blouse design guide covers the fit decisions.
What if my saree is too long or too short?
Most sarees are 5.5 to 6 metres. If yours is too long, tuck more length into the petticoat at the first tuck (step 2) — the excess will sit hidden inside. If your saree is too short, take a smaller first tuck. If dramatically too short — by more than half a metre — it may simply not work for the Nivi; consider a different regional drape that uses less length.
Can I drape a saree without safety pins?
Yes, with practice. Many experienced wearers across India drape a saree daily with no pins at all. The tucks and the natural friction of the fabric against the petticoat are enough once you become confident. For a beginner, however, two pins (one at the shoulder, one at the pleats) provide insurance against slippage during the first few outings. For fluid fabrics like chiffon and georgette, two pins are necessary; see our chiffon saree guide for fabric-specific pinning advice.
How do I drape a saree if I am wearing a pre-stitched petticoat with elastic?
Elastic-waist petticoats work fine for the Nivi drape, but the elastic must be tight enough to hold the tucked saree in place. Loose elastic is the most common cause of a sagging drape. If your petticoat has loose elastic, replace it before draping. A drawstring petticoat is generally easier for beginners because you can tie it as tight as you need.
Is it easier to drape a saree on yourself or with help?
Once you know the steps, learning to drape a saree by yourself is straightforward — and in fact most Indian women drape a saree daily without help. For a very first attempt, having someone hold the pallu or help with the pleats can speed up the learning. But the goal should be self-sufficiency: a saree is meant to be a garment you can drape yourself, without needing assistance.
One more thing
Learning to drape a saree takes practice. The first attempt rarely matches the photograph; the second is better; by the fifth, the muscle memory has begun to form. This is normal. Every woman who wears a saree learned to drape a saree the same way — through repetition, small adjustments, and the willingness to undo and redo when something does not sit right. Be patient with yourself. Learning to drape a saree is a skill, and like every skill, it rewards time.
The Nivi we have walked through is one of many ways to drape a saree. As your confidence grows, the other regional drapes open up. For now, the Nivi is enough — it is the drape worn at most occasions, in most regions, by most modern wearers. Once you can drape a saree in the Nivi style, the world of sarees becomes meaningfully more accessible.
Follow the journey
Be there from day one.
IndiaNiva is launching its online shop soon. Until then we are building quietly — sourcing beautiful sarees, researching tailors in Europe, and writing tutorials like this one. Two thoughtful emails a month. Nothing more.
Continue reading
- What is a saree? An essential beginner’s guide — start here if sarees are new to you
- Cotton saree guide — the forgiving practice fabric
- Banarasi vs Kanjivaram — choosing a heavy silk to drape
- Chanderi saree guide — lightweight dressy drape
- Georgette saree guide — fluid drape considerations
- Chiffon saree guide — the most fluid drape and how to manage it
- Organza saree guide — crisp voluminous drape
- Tussar silk saree guide — wild silk with friendly drape
- Pre-stitched saree guide — the ready-to-wear alternative
- How to wear a saree in winter — adapting this drape for European cold
- Your first saree wardrobe — the five pieces to build first
- Saree blouse design — the blouse that completes the drape
This guide on how to drape a saree draws on Valentine’s own practice over the past two years in Munich, conversations with European saree wearers, and the Victoria and Albert Museum’s South Asia collection for historical drape context. Where specific references appear, the source is linked. All information is correct at the time of writing.